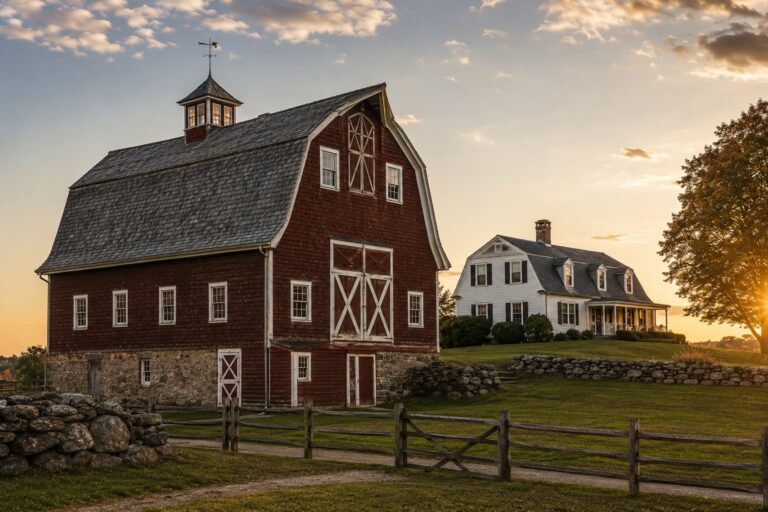
Here is how to measure a roof for shingles in four steps. Find your building’s exterior length and width. Add your eave overhang. Apply a pitch correction for slope. Convert the total into roofing squares. You can do this from the ground with a tape measure and a level. You can also do it from an attic with the same basic tools. Or you can use satellite imagery and aerial measurement reports instead. This lets you skip climbing entirely. Each method trades off speed, cost, and accuracy differently.
This guide walks through the exact steps for a simple roof. It then covers dormers, valleys, multiple roof sections, and metal roofing measurement. Most guides skip these parts. It ends with a clear answer to the question that matters most. Should you measure it yourself, or pay for a professional report?
✓
Key Takeaways
Roof area always exceeds your home’s flat footprint. The pitch correction
factor adds anywhere from 1.4 percent at 3:12 to over 41 percent at 12:12.
You do not need to climb on the roof to get a workable estimate. Ground
and attic measurements are enough for a simple gable roof. Combine them
with a pitch reading.
Satellite and aerial measurement reports skip the climb entirely. They
usually cost between $20 and $100 per report. Aerial measurement providers
commonly report this range for 2026.
Metal roofing measurement follows the same footprint and pitch math as
shingles. Panel width and seam layout still change how you plan the order.
A hip roof is one situation. Multiple roof sections is another. An
insurance claim is the third. These three cases are where paying for a
professional measurement most often pays off.
What do you need before you measure a roof for shingles?
Roof measurement is the process of finding the total sloped surface area of a roof. It is expressed in square feet or roofing squares. This lets materials get ordered and priced correctly. It differs from a home’s floor plan square footage. The slope of the roof spreads that same footprint over a larger surface.
Before you start, gather a few tools. Get a 25 foot tape measure. Get a 4 foot level or a speed square. Bring a notepad. Bring a calculator or phone too. A second person makes ground measurements much easier on a large or irregular home. You do not need to get on a ladder for the ground based steps below. You will need a ladder briefly for one thing. That is checking your pitch from the roof edge instead of the attic.
How do you measure your roof’s length and width from the ground?
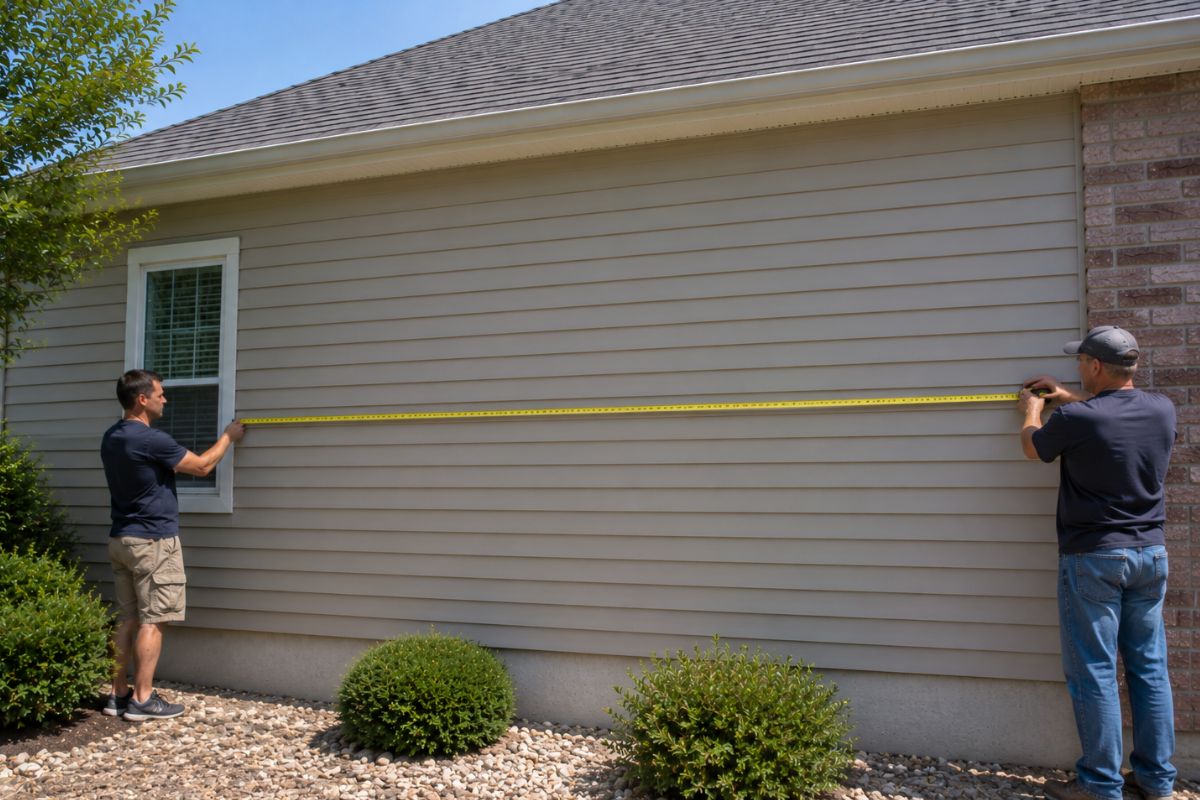
You measure your roof’s length and width in one basic way. Walk the exterior perimeter of your home with a tape measure. Record each wall segment separately. Start at one corner of the house. Measure along the exterior wall to the next corner. Write down each measurement before moving to the next segment.
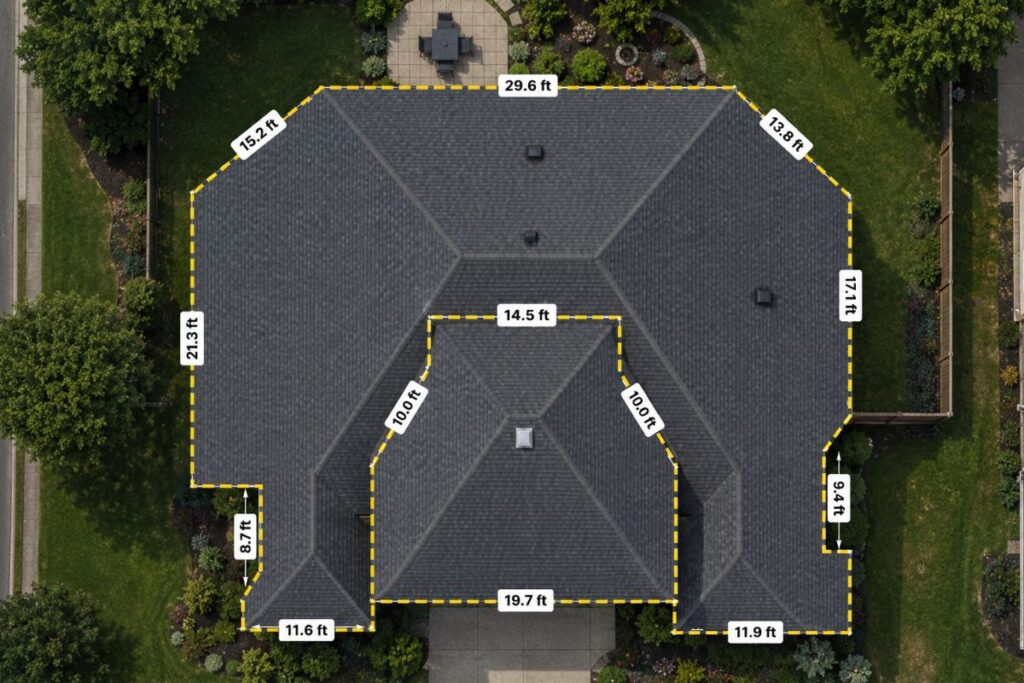
For a simple rectangular home, you only need two numbers. These are the overall length and the overall width. Does your home have an L shaped, U shaped, or otherwise irregular footprint? Break the building into rectangular sections first. Measure each section on its own. You will add the areas together later.
Add your eave overhang to every outside edge before you finish this step. Most homes overhang 12 to 18 inches past the exterior wall. Skipping this addition is one of the most common reasons a DIY measurement comes up short later.
Write every measurement down as you go. Include which wall or section it belongs to. Do not try to remember numbers until you get back inside. A simple sketch of the roof outline helps too. Label each measurement next to its edge. This prevents mixing up sections later.
How do you find your roof’s pitch?
You find your roof’s pitch in one basic way. Measure how many inches a rafter rises for every 12 inches it runs horizontally. This is most easily done from inside the attic with a level and a tape measure. Hold the level flat against the underside of a rafter. Mark 12 inches out from a fixed point. Measure straight down to the rafter at that mark to get your rise in inches.
If you do not have attic access, try a smartphone app instead. One using the phone’s built in inclinometer gives a usable pitch reading from the ground or the roof edge. Builder plans, permit records, or an appraisal document sometimes list the pitch directly. This is worth checking too.
Once you have your pitch, use the Roof Pitch Calculator on this site. It converts your reading instantly. You get the angle, the slope percentage, and the correction factor you need next.
Can you measure a roof without climbing on it?
Yes, you can get a workable roof measurement without ever climbing on the roof. Use either satellite imagery or a professional aerial measurement report. Both skip the ladder entirely. They differ in accuracy and cost.
Satellite based tools let you trace your roof’s outline on an aerial image. You get an automatic area estimate this way. This works well for a simple roof shape. It becomes noticeably less accurate on some homes. This includes homes with dormers, multiple pitches, or overlapping roof planes. The flat aerial view cannot see slope. It also cannot read the true edges under tree cover.
Professional aerial measurement reports use higher resolution imagery and modeling software. Companies such as EagleView sell these reports. They generate a detailed report showing every roof plane, ridge, valley, and hip length. These reports typically cost between $20 and $100. The exact price depends on home size and report detail. This is as commonly reported by aerial measurement providers in 2026. Many roofing contractors already order one as part of preparing a quote.
Method
Typical cost
Best for
Ground and attic measurement
Free (just your time)
Simple gable or hip roofs, comfortable doing your own math
How do you measure a roof with dormers, valleys, or multiple sections?
You measure a roof with dormers, valleys, or multiple sections in one basic way. Break the roof into simple shapes first. Measure each shape on its own. Then combine the results. Most DIY measurements go wrong at this exact point. People try to measure the whole irregular outline as one figure instead.
Start by sketching the roof from above. Use a satellite image, or work from memory while standing in the yard. Draw a line wherever the shape changes. This separates the roof into rectangles and triangles. Do this where a dormer projects out, or where two roof sections meet at a valley.
For each rectangular section, measure length and width. Use the same method as the main footprint. For a triangular section, measure the base and the height separately. A dormer face or a gable end are common examples of this shape. The area formula for a triangle is different from a rectangle.
A valley is where two roof planes meet at an inward angle. It does not need its own separate area calculation. It affects the two roof planes on either side of it through extra cuts and waste. This is why complex roofs need a higher waste allowance than a simple gable. The valley itself is not a shape you measure on its own.
Give every section its own measurement first. Then calculate each section’s pitch corrected area separately. Add the totals together. Different sections of the same roof can carry different pitches. Both the Roof Pitch Calculator and Roof Area Calculator on this site handle this. They manage the multi-section addition for you. Just plug in your individual measurements once they are ready.
How do you measure a roof for metal roofing instead of shingles?
You measure a roof for metal roofing using the same footprint and pitch correction math as shingles. You also need to measure panel runs and seam spacing. Standing seam and corrugated metal panels are ordered by the linear foot of each roof run. Square footage alone is not enough.
Measure the length of each roof slope from eave to ridge. Follow the direction the panels will run. Most metal panels install vertically from eave to peak in one continuous piece. This eave to ridge distance determines what panel length to order. Running a single panel the full slope length avoids a horizontal seam. Shingles do not have to worry about that.
Measure the width of each roof plane separately from the panel run length. Panel width matters here. It typically runs 12 to 24 inches, depending on the product. It determines how many panels fit across that plane. Divide the plane’s width by your chosen panel’s coverage width. This gives you a panel count for that section. Repeat for each distinct roof plane.
Metal roofing also needs separate measurements for three things. These are ridge cap, hip cap, and any valley flashing. This is similar to shingle roofing. These components are typically ordered in preformed lengths instead. They are not calculated from a linear foot to bundle ratio.
How do you convert your measurements into roofing squares?
You convert your measurements into roofing squares in one step. Take your total pitch corrected area, including waste, and divide it by 100. A roofing square equals exactly 100 square feet of roof surface. It is the standard unit contractors and suppliers use for pricing and ordering across the United States.
Want the full pitch correction formula and a complete worked example? The Roof Area Calculator on this site handles this conversion directly. Just use your own measurements. It gives you an instant square count based on your own dimensions.
Should you measure your own roof or hire a professional?
Measure your own roof yourself if it has a simple gable or hip shape and a single consistent pitch. This works well in one case. You need to feel comfortable double checking your math before ordering material. This covers the majority of single story homes. It is the most cost effective option when nothing unusual is going on with the roof shape.
Pay for a professional aerial report or a contractor measurement in three cases. Your roof has multiple pitches. It has several dormers. Or it has complex valley intersections. The margin for a costly measurement error grows with every additional roof plane. The same applies if you are filing an insurance claim. Insurers commonly expect a standardized measurement report. A homeowner’s own tape measure figures are usually not enough.
Get at least two independent measurements whenever you are comparing multiple contractor bids. This could mean two contractors. Or it could mean your own count checked against a satellite estimate. Does a contractor’s square count differ noticeably from your own or from a second bid? Ask them to explain their measurement method before you sign anything.
Do you plan to walk your own roof edge? Maybe you want to double check a measurement or look closer at a valley. Treat this like any other roof access situation. The Occupational Safety and Health Administration sets fall protection requirements for roof work. The same caution that applies to a contractor applies to a homeowner on a ladder or roof edge.
What are common mistakes when measuring a roof?
Letting a long tape measure sag between two distant points is a common and easy to miss error. A tape measure held at both ends across a long wall section will sag under its own weight. That adds slack. It can read as several extra inches on a 40 or 50 foot run.
Tracing an inaccurate outline on a satellite tool is a frequent problem on tree covered lots. Overhanging branches and shadows can hide part of the roofline on aerial imagery. This leads to a traced outline that is smaller than the real roof.
Missing a rear extension, sunroom, or attached garage is another common oversight. This happens most when that section is not visible from the street. Walk the full perimeter of the home. Do not measure only what is visible from the driveway. This catches missed sections before they become a shortfall.
Confusing the fascia line with the actual roof edge is a common error. It causes small but steady mistakes. The fascia board sits at the outer edge of the eave. The roofing material itself may extend slightly beyond that line. Or it may stop slightly short of it. This depends on the drip edge detail. Measure to the actual edge of the roof deck or shingle line instead. Do not assume the fascia marks the exact boundary.
Recording measurements from memory causes real problems. Write them down as you go instead. Numbers get mixed up on any roof with more than a couple of sections. A labeled sketch prevents this. Even a rough one works far better than trying to remember six or eight separate wall lengths.
Frequently asked questions
How do I measure a roof for shingles?
Measure your building’s exterior length and width. Then add your eave overhang to each edge. Find your roof’s pitch. Apply a pitch correction factor next. This converts your flat footprint into actual sloped roof area. The Roof Pitch Calculator and Roof Area Calculator on this site handle the rest. Get your raw measurements first. Then they convert the pitch and calculate your squares.
How do I measure a shingle roof myself?
You can measure a shingle roof yourself. Use a tape measure for the exterior dimensions and a level for the pitch. You do not need to climb onto the roof surface itself for a simple gable or hip shape. Walk the full perimeter. Record each wall segment. Add your eave overhang. Then find your pitch from the attic or with a smartphone inclinometer app.
How many squares is my roof?
Your roof’s square count equals your total pitch corrected roof area divided by 100. That total already includes your waste allowance. A 2,000 square foot pitch corrected area with waste included works out to 20 roofing squares. The Roof Area Calculator on this site performs this conversion directly. Just enter your building dimensions and pitch.
How do I measure the square footage of a roof?
Measure your exterior footprint including eave overhangs. Multiply that figure by the pitch correction factor matching your roof’s slope. A 6:12 pitch adds about 11.8 percent to your flat footprint. A 1,500 square foot footprint becomes roughly 1,677 square feet of actual roof surface this way. That is before any waste allowance.
How do I measure a roof for metal roofing?
Measure a roof for metal roofing the same basic way as shingles. Use the same footprint and pitch correction approach. Also measure the eave to ridge length of each roof plane and its width. Metal panels are ordered by length and width, not only by total square footage. Panel coverage width determines how many panels are needed across each roof plane. This width typically runs 12 to 24 inches.
How do I measure for a metal roof if I am replacing existing shingles?
Measure the same way you would for a new metal roof. Use your building’s footprint, pitch, and the eave to ridge length of each roof plane. The existing shingle layer does not change the underlying roof geometry. Confirm this with your installer. Will the old shingles be removed, or covered instead? That decision affects deck preparation, not the panel measurement itself.
What is a square on a roof?
A square on a roof is more commonly called a roofing square. It equals 100 square feet of roof surface area. Contractors and suppliers across the United States use it as the standard pricing and ordering unit. To find your square count, divide your total measured roof area by 100.
I have a hip roof with two dormers. How do I measure it myself?
Break the roof into its simple shapes first. This means the main hip planes. It also means the two dormer faces. Include any valley sections where the dormers meet the main roof. Measure each shape separately before adding the totals together. Hip roofs need a higher waste allowance than a simple gable, because of the angled cuts at every hip line. The Shingle Calculator on this site walks through the specific waste percentage and bundle count. Use it once you have your measurements.
Is it worth paying for a professional roof measurement report?
Yes, if your roof has multiple pitches, several dormers, or complex valleys. It is also worth it if you are filing an insurance claim that expects a standardized report. The typical $20 to $100 cost pays for itself in those cases. For a simple gable or hip roof on a single story home, a careful DIY measurement is usually accurate enough. It saves that cost entirely.
The bottom line
Measuring a roof for shingles comes down to four numbers. Your footprint, your overhang, your pitch, and your waste allowance. Get those four right. You can do this from the ground with a tape measure, or from a satellite report. The square count that follows will be accurate enough to order material. It also works for comparing contractor bids with confidence. Complex roofs and insurance claims are the two clearest situations for paying for a professional measurement instead. This guide is built for informed decision making. For a structural question or a formal quote, always work with a licensed local contractor.
Quick Summary
Ground measurement plus a pitch reading covers most simple gable and hip roofs. It costs nothing beyond your time.
Satellite tools give a fast ballpark. Professional aerial reports cost $20 to $100. They handle complex shapes far more reliably.
Dormers, valleys, and multiple sections all get measured as separate simple shapes. Then you add them together.
Metal roofing needs the same footprint and pitch math as shingles. It also needs panel length and width per roof plane.
Complex roofs and insurance claims are the clearest cases for paying for a professional measurement.
The six main types of gutter guards are micro-mesh, mesh, screen, foam, brush, and reverse-curve and the right one for your home depends mainly on the size of debris you get and your climate. Micro-mesh guards block the finest debris and perform best in heavy tree cover and snow mesh and screen guards handle typical…
A low pitch roof has a shallow slope. It generally sits between flat and a standard 4:12 pitch. It needs different materials, ventilation, and waterproofing than a steep roof. Most sources place the low slope cutoff between 2:12 and 4:12. OSHA sets its own regulatory line at 4:12 for fall protection purposes. Asphalt shingles work…
The most common types of roof trusses are Fink, Howe, Scissor, Attic, Mono, Queen Post, King Post, and Hip trusses. The right one for your project depends on a few things. These include your roof span. They also include your ceiling style. And they include whether you need extra storage or living space above. Fink…
In the clay vs concrete roof tiles decision, clay is the better choice for most homeowners who plan to stay in their home long term and live in a climate with hard winters, because clay lasts 50 to 100 years, holds its color permanently, and absorbs far less water than concrete. Concrete roof tiles are…
Most homes can hold about 20 pounds of snow per square foot before the roof feels stressed. That works out to roughly 4 feet of fresh, fluffy snow. Or about 2 feet of old, packed snow. That number is not fixed for every roof. It shifts based on your roof’s age, pitch, and material. It…
A gambrel roof design is the right choice when you want the most usable upper floor space for your money, which is why it dominates barns, storage sheds, and Dutch Colonial homes across the US. Builders commonly estimate that a gambrel delivers roughly 40 to 50 percent more usable upper level space than a gable…